
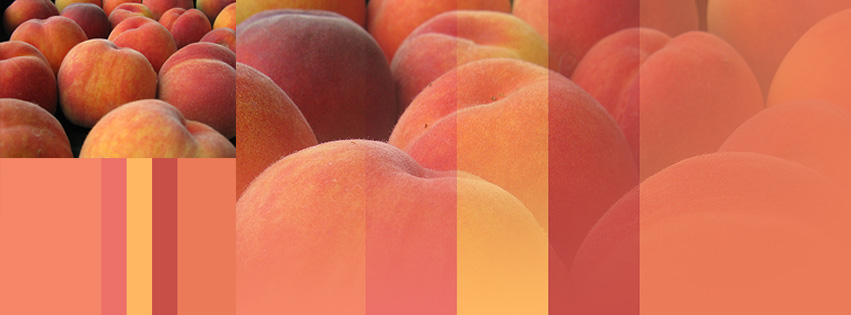
Since we’ve been working hard in November to add more downloadable photos and their related color palettes to Colormusing’s new online shop, I thought I’d take a break and show you something simple-but-stunning to do with them: A 2-layer montage to use as a Facebook cover image!
Here’s what I’m starting with for mine: The Peaches I photo and its coordinating palette, Just Peachy.
Here’s how to do it.
Note: As for all my A Musing tutorials, I’m using Adobe Photoshop CC 2014. However, the functions I use for virtually everything I do (including this tutorial) are part of Photoshop Elements, as well as other popular paint-type applications. If you’re using PS Elements or something other than Photoshop for your version of this tutorial, I’d love to know what your results are!
- Create a new document, 851 x 315 pixels (if you’re making a Facebook cover image, as shown in my example).

1. Create a new image. For a Facebook cover image, your new document should be 851 x 315 pixels, 72 dpi, RGB mode. 2. Choose your photo, open it, and resize it:

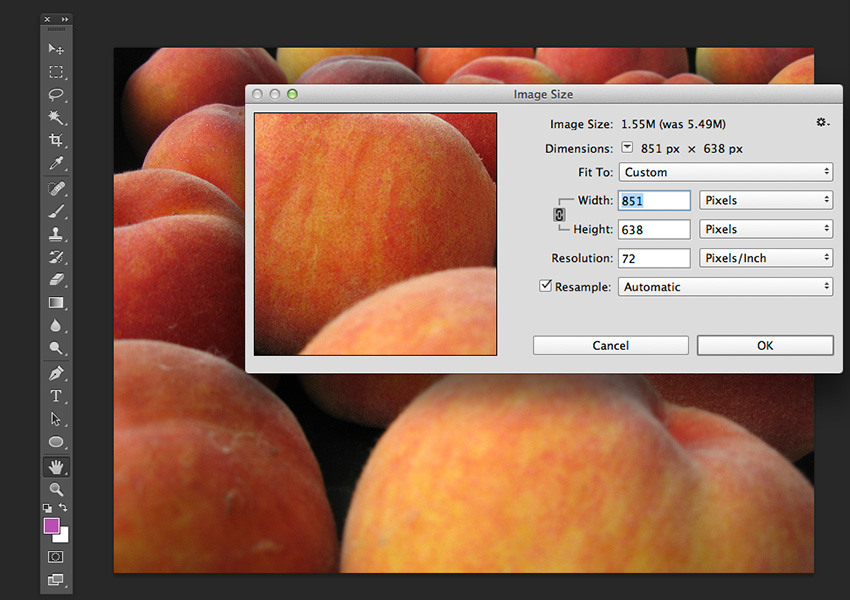
2. Resize your photo to fit your new document: Go to Image — Image Size, and this window will appear. I’m setting the width to the 851 pixel width of my new document (the height will automatically adjust, if the Resample is set to Automatic, as shown here). 3. After resizing, Select All, Copy, Paste the photo into your new document:

3. Position and crop photo. After pasting your photo into the new document, drag it around until you like its position; I’ve decided to keep the top part of my photo. Select All, go to Image — Crop, to delete the unused part of your photo. 4. Repeat this resizing process with your palette:

4. Resize your palette using the same process as for your photo. 5. As for the photo, Select All, Copy, Paste the palette into the document:

5. Paste the palette into your document. Note the layers (on the right): The Peaches layer is on top of the palette layer, so that’s what’s visible. (For now!) 6. Select the photo layer, and add a mask:

6. Select the photo layer, then click the Mask icon to add a mask to this layer. (This is how we’ll blend the 2 layers together.) 7. Choose the Gradient tool:

7. Choose the Gradient tool. You’ll use this to create the mask. 8. Click and drag to create your mask.

8. Create your mask. With the Gradient tool selected, click and drag over part of your image; release when you’ve covered about half of your photo. (The white line here indicates how I drew my Gradient line, but you can go in any direction you wish.) 9. When you like your mask effect, apply the mask: Go to Layer — Layer Mask — Apply.
Tip: If you suddenly hate your mask effect, before Applying it, go to Layer — Mask — Delete, then start over at Step 6.
Isn’t that pretty? (I just love doing this kind of thing!) Now all that’s left to do is…
10. Save your montage to use on Facebook: Go to File — Save for Web, choose your image settings (you probably don’t need Maximum quality for Facebook use, for example), then hit Save.


Now just upload your beautiful new cover montage to your Facebook page, and let the admiration begin!

Now that you’ve mastered the basics of creating montages, go on and experiment with blending your own photos together! You’ll feel like an artist— and your Facebook page will thank you.
