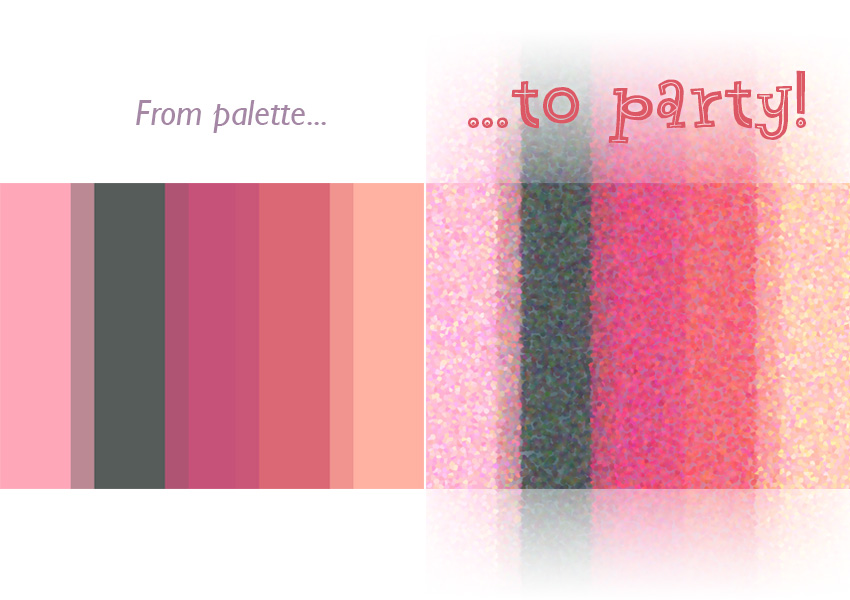
As much as I love my colorful stripe-y palettes (and I do), even I am occasionally in the mood for something a little fancier. Here’s one of my favorite ways to change those stripes:
Talk your palette into changing its stripes with this easy Photoshop tutorial! (Note: As for all my Photoshop tutorials, I’m using Adobe Photoshop CC 2014*.)
Here’s the super-simple way to do this (followed by the fancier version), starting with my expanded palette from the end of my recent tutorial:
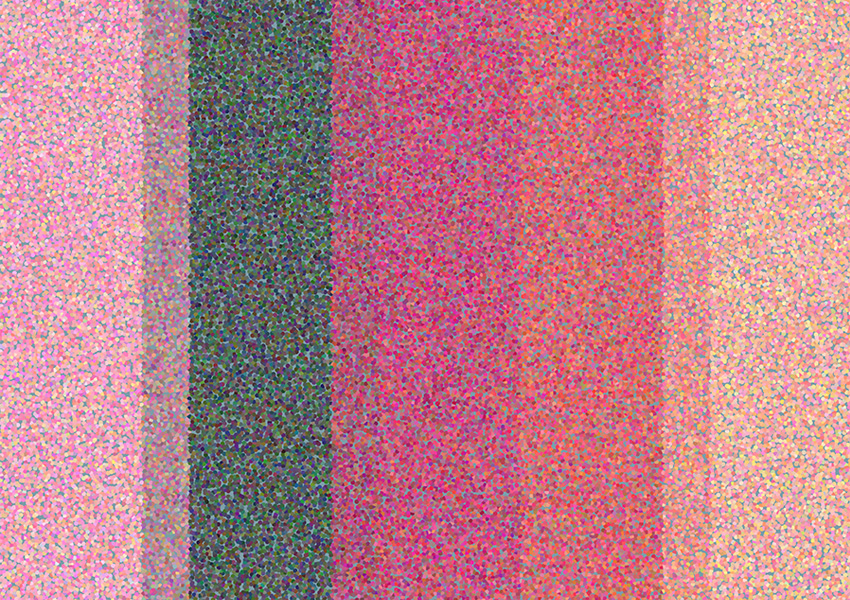
Step 1: Duplicate your palette layer.Step 2: With this new layer selected, Go to Filter, Pixelate, Pointillize.Step 3: Choose your Cell Size. I’m going to use 20, but you can experiment with different sizes. (Note in the following image that the cells actually look much smaller than in the Pointillize window.)Done! Easy, right? Now your palette is all dressed up and ready to use as a background, custom fabric design, scrapbooking printable, or whatever you can dream up!
But wait… there’s more!
If you want to gussy up your palette even more to look like the party-going version at the top, let’s work on a slightly more involved process, starting back at the end of Step 1 (above):
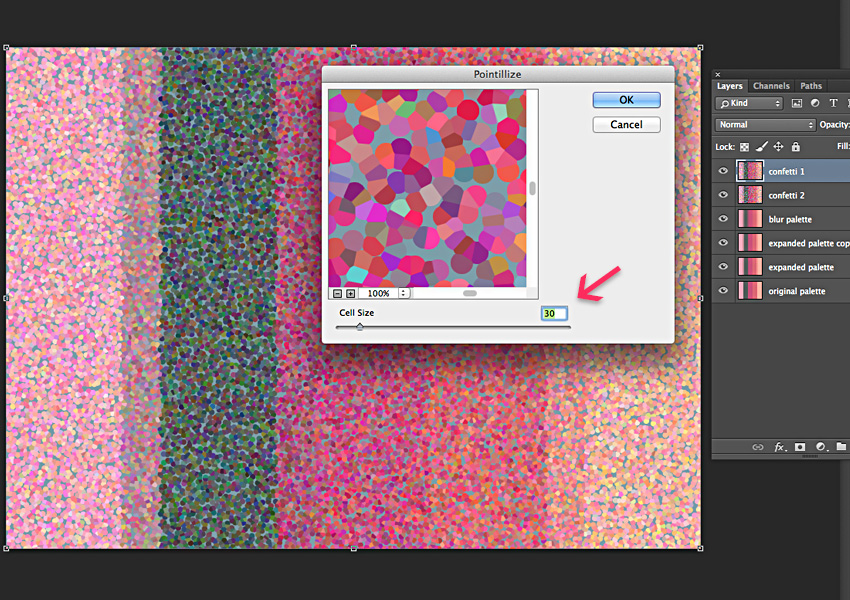
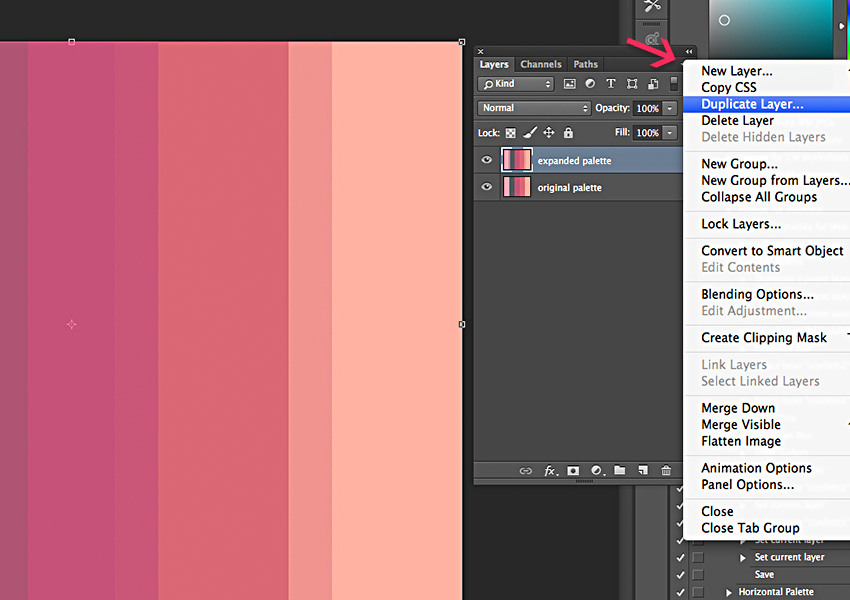
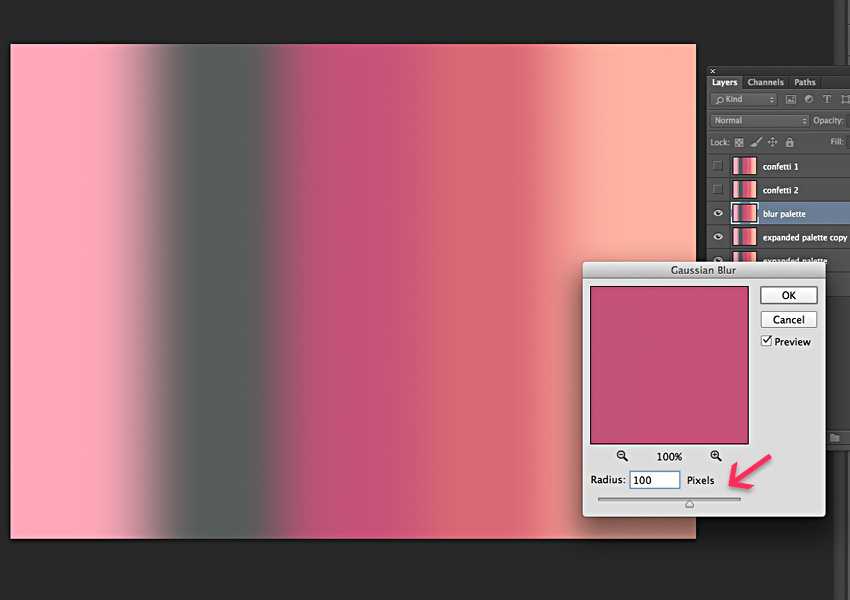
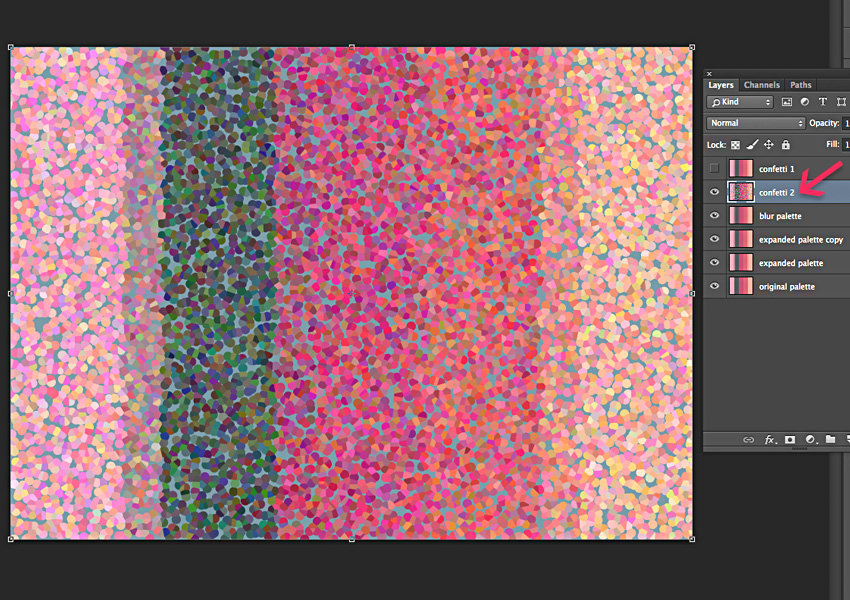
Step 2 (following Step 1, above): Duplicate your palette layer 3 more times; give them names so you know which is which. (I like my layer names to describe what I’m going to use them for.)Step 3. Blur 1 layer: Select the Blur Palette layer; go to Filter, Blur, Gaussian Blur. I chose a Radius of 100 (higher number = blurrier), to get the effect shown here. (Notice that I’ve turned off the little eye icons to the left of the top 2 layers? This makes these layers temporarily invisible, so I can see what’s happening with my blur layer.)Step 4: Pointillize 1 layer. Choose the Confetti 2 layer, then go to Filter, Pixelate, Pointillize, and choose a cell size of 50.Step 5: Pointillize the last layer: Select the Confetti 1 layer, then repeat Step 4 to Pointillize, but choose a different Cell Size this time (I chose 30).Step 6: Blur the top layer slightly. With the Confetti 1 layer still selected, go to Filter, Blur, Gaussian Blur, and choose a slight blur (mine is 6.6).Step 7: Apply a Spatter effect (optional). With the same top layer still selected, go to Filter, Filter Gallery, then choose Spatter (under the Brush Strokes category). I used Spray Radius 15 and Smoothness 1.
Almost done! Now we just need to play around with blending all these layers together.
Step 8: Change top layer opacity to 70%. You can see the difference even this small change makes.Step 9: Choose a Blend Mode for the second layer. With Confetti 2 (the one under the top layer) selected, click on the Blend Mode drop-down list, and try different ones until you like the effect you’re getting; I chose Overlay in this case.Step 10: Change the Blend Mode of the top layer. With Confetti 1 selected, go back to the Blend Mode drop-down list, and choose one for this layer. I like Screen with these colors, but you can get wildly varying effects with the other Blend Modes, so play with this! (To get the same effect as the “party” version at the top of this post, choose Lighten for this step.)
There! A beautifully artistic rendering of what used to be a simple color palette, that can be used in many creative ways. Now that I’m thinking about it, you could just take this pointillized palette and have it printed on one of those custom canvases (I like Canvas on Demand*) for a gorgeous modern-art gift; I’ve often seen canvases that were nothing but stripes, and I’ve always thought they make a very striking effect, especially in a group of different-sized canvases.
Now go and play with getting your own palettes to change their stripes!
Want to see sewing stuff from Colormusing? Check out myBratelier (lingerie sewing, including bras!), and Changing Your Clothes, which covers everything from repairs & alterations to dyeing and remaking thrift-shop finds. And don’t miss all my newest projects, including sew-alongs, at the brand-new SewColormusing blog!
Click on the dots above to visit my mother ship, Colormusing.com, where you can also sign up to receive Hue News, Colormusing’s own monthly e-mail newsletter!
*I am not affiliated in any way with Adobe or Canvas on Demand, or any other companies, as of this writing (I will let you know if that changes). I just really like Photoshop, and I’ve had a lot of my own photo montage works printed on canvas at Canvas on Demand. : )